Last year during the summer, I focused heavily on playing less video games and spending less time indoors to compliment may commitment to losing weight (it worked too, lost about 25-30lbs during the year!). While I did also diet and increased the frequency of my usual outdoor summertime activities such as golfing, riding my mountain bike, and taking my dog for more walks, I also wanted to attempt something new as well, something constructive. I ended up deciding on building my folks a new tool shed for their backyard. I felt this is was a perfect project for me to get some exercise outside, do something constructive, and learn some handy skills in the process. I’m an project accounting guy by day and a gamer by night, so picking up power tools is definitely not something I’m used to. Fortunately my dad is a handy person and was there to help me when I needed advice, guidance, or an extra set of hands.

Here’s the old shed that came with the house they bought back in the 90s so we can only assume the shed is fairly old too. While structurally it was sound, it’s visual appeal wasn’t the best. My folks have slapped on a fresh coat of paint and new shingles from time to time so it wasn’t exactly terrible it just wasn’t the best. So after some browsing around at local stores and on Google, we decided on a general design and to build it from raw materials rather than buy a package. You’ll see this at the end, but we also decided on making it match the house and garage. Both of those have a light yellow vinyl siding, brown shingles and trim, and white doors and window frames. So to give it the ol’ razzle dazzle we decided on the same colour scheme.
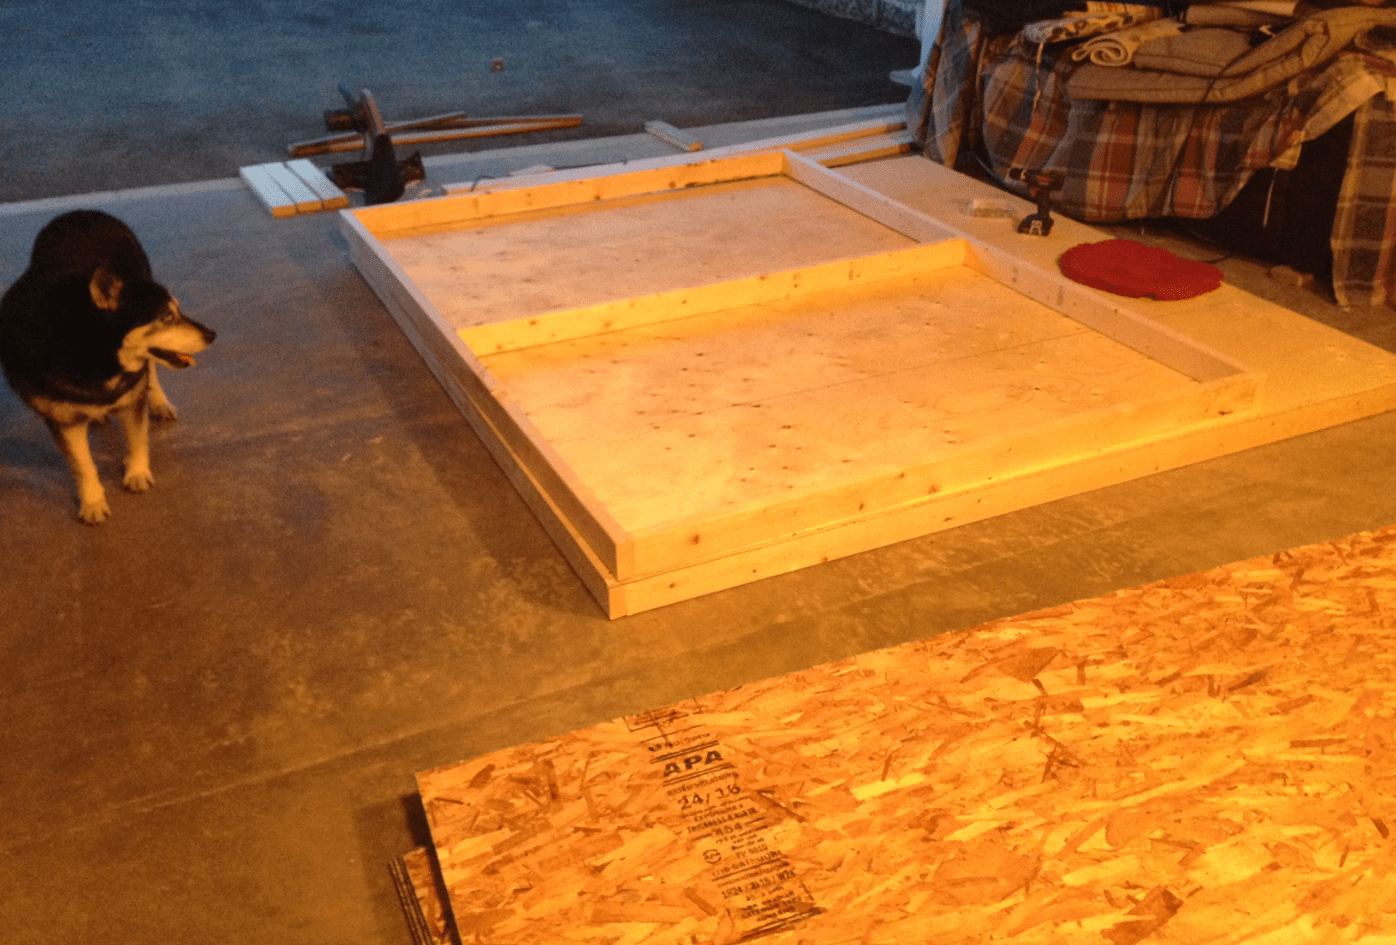
Right off the hop, I’m going to apologize for the pictures, my photography skills are sub par and I was only using my phone. As mentioned, we decided on starting from scratch. So after we decided on the design and picked up the starting materials, here we began working on the base and the wall frames. Lira is looking on with excitement, maybe thinking we’re building her a mansion of a doghouse.

After the base and wall frames, we decided to move it outside for assembly so that it would be easier to move into place once ready. The walls and rear half wall were fairly straight forward to put together.

The frame for the roof was a bit trickier due to the angles required rather than a just a right angle. I started getting pretty comfortable using a miter saw by this point so it wasn’t too bad.

With the frame for the roof done, we wrapped up the back wall and a few support beams for the back.

Next came from the front panels and support beams, and as you can somewhat see we began putting on the plywood for the roof. For those front panels with the angle I learned how to use a hand held circular saw.

The roof is now complete (the plywood part anyways).
Front panel above the door was then cut and installed. Took a little bit of measuring and whatnot given the angle but nothing too bad.

So this is something like an insulation wrap that would go in additional to regular insulation on a house or garage as an added layer to retain heat and resist water. Now, for a tool shed this is not necessary, however we had a bunch of it sitting in the garage for years and decided to use to up by putting it on. Also, Lira was giving a disapproving look as I think I believe at this point she realize it’s not for her.

As this shed is going into a corner section of the yard, and on one side where it should be exposed is the doghouse, we had to finish off the sides and back before we could move it into place. The vinyl siding we used matches the house and the garage so it’s a nice touch.

Continuing the vinyl siding, we had to cut and properly install all the vinyl edges to match the angles of the roof as well. It wasn’t too bad but it was a bit tricky at times. Also, you can now see we’ve installed a door frame as well. By this time I felt I’ve basically mastered the miter saw.

More progress on the siding, decided we were on a roll and applied the front siding too even though the could’ve been done after the shed was moved into place. Also, at this point we painted the base a grey and the sides on the roof’s edges a brown as it matches the eaves troughs of the house and garage.

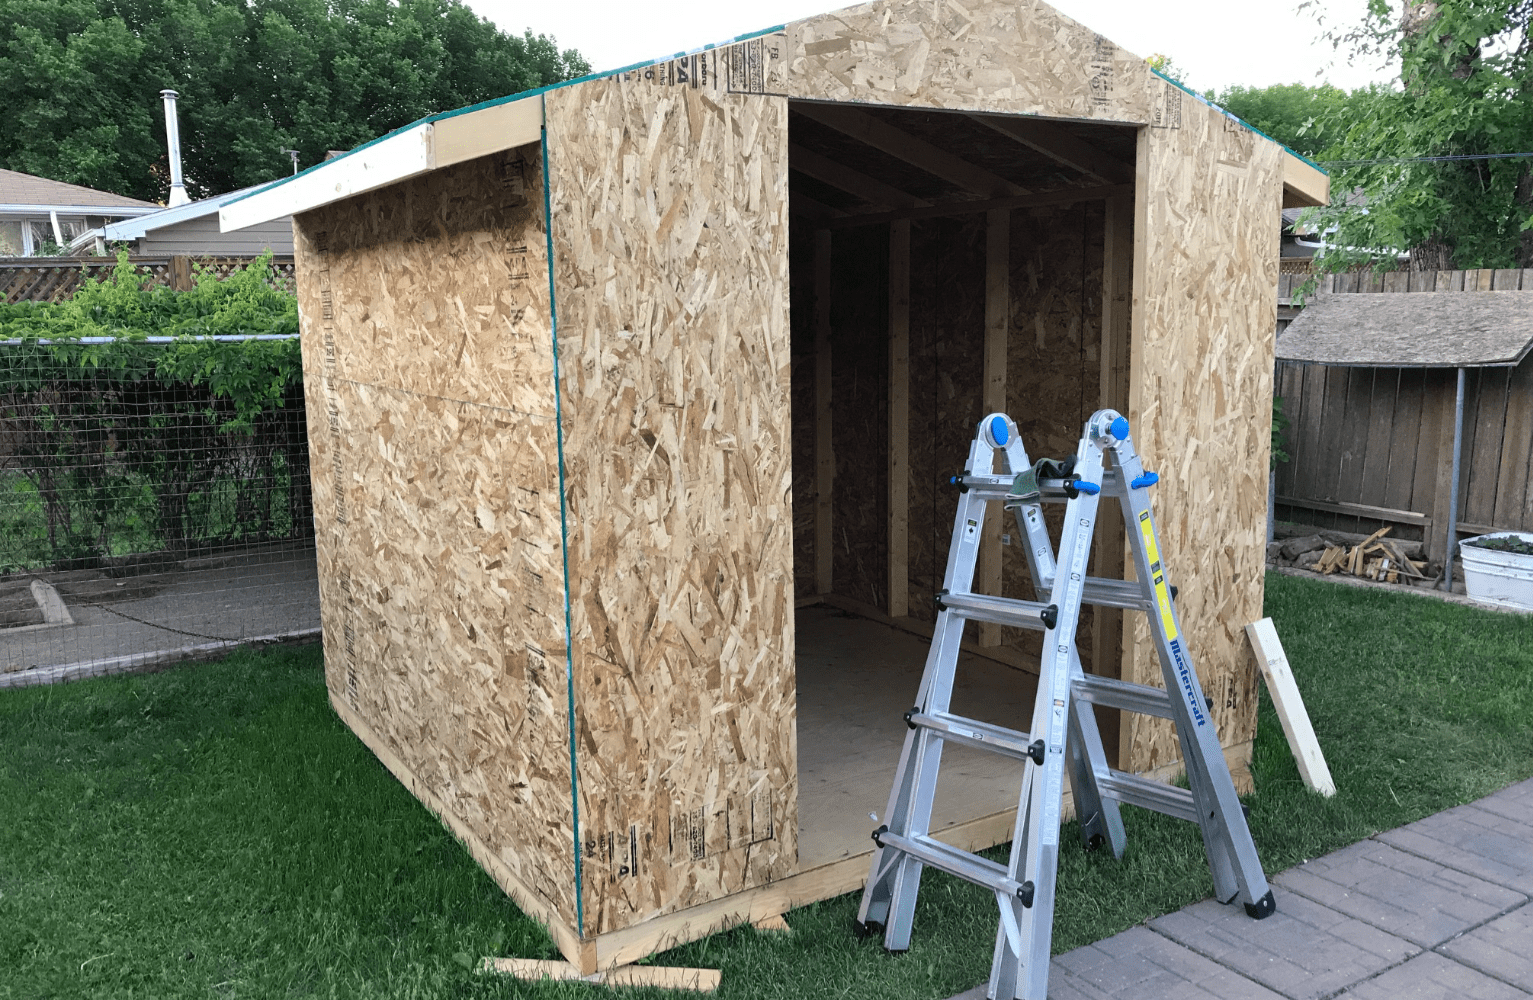
Before we continued the rest of it, we moved it into place. This was because the shingles were fairly heavy and they could be installed after the fact. But before we could do this, we had to dismantle the old shed which was all on me (because it was fun using the crowbar and sledge hammer!). We lifted the whole shed using a long steel bar as a lever, then put about six steel 3″ pipe under it. With that we were able to roll it into the place of the old one.

Once in place, the next step was to begin roofing. Again, brown matching shingles were chosen that match the house and garage. And speaking of matching, we painted the door frame white (and eventually the doors) so they too match the house and garage. Lastly, the old shed makes a guest appearance in this picture on the right side. It’s now all chopped up and will be great firewood for the fire pit this upcoming summer!

Now with the doors up. These were exceptionally a pain in the ass. Mainly it was due to getting a perfect fit in terms of height and depth after we built them. We did have to dismantle them once and start again after we did not calculate for the thickness of the hinges. Eventually we did get it all worked out and it was nice and flush in terms of depth, and as level as we could get it with some minor adjustments.

And ta da! Last touch was painting the doors and adding the lock. It’s not a perfectly constructed shed, nor is it professionally designed, but we’re rather happy with it. Working on this summer project was great, it gave me confidence in handling some basic woodworking tools, got me plenty of sun and exercise, and gave me a tangible constructive project. I think it also adds a little to the value of my parents place since it nicely matches the house and garage. But most importantly I spent lots of time with my dad during the summer and had a lot of fun building it.


